www.iFourWinns.com

Dedicated to Current and Future Owners
It is currently Sun Apr 28, 2024 9:06 pm

All times are UTC - 6 hours [ DST ]


Post new topic Reply to topic  [ 18 posts ]  Go to page 1, 2  Next
Author Message
PostPosted: Thu Jul 10, 2014 7:50 pm 
Offline
Dolphin
User avatar

Joined: Fri May 16, 2014 8:17 pm
Posts: 99
Location: Bridge Port Marina - Orillia
The headrest of my Vista 348 (2005), snapped today.
Image

The base of the headrest cracked where the two screws attached it to the back of the seat - see the second picture that shows the broken screw holes

Image

What is the white "plastic like" material Four Winns uses for the structure in this headrest and other places around the boat? Is it commonly available? I could probably remove the material and duplicate it and re-insert it into the headrest with a lot of patience and luck.

All suggestions appreciated.

_________________
Image
Ernie Follis
It'll Do II
Four Winns 348 (2005)


Top
 Profile  
 
PostPosted: Thu Jul 10, 2014 8:09 pm 
Offline
email admin your custom rank

Joined: Sun Jul 05, 2009 5:56 am
Posts: 930
Location: Georgian Bay, Ontario
It is starboard, you should be able to get a piece at the service counter there at Bridgeport.
Any chance you could epoxy it and then re-screw it?

_________________
2001 328 Vista "Nauta Dream 2"
AB Inflatable 10AL "Little Dreamer"
2000 248 Vista
1997 225 Sundowner


Mike


Top
 Profile  
 
PostPosted: Thu Jul 10, 2014 8:28 pm 
Offline
email admin your custom rank

Joined: Thu Jul 13, 2006 7:45 pm
Posts: 2866
Location: Indiana
I had the same issue with my rear seat..upper part broke off. I took some metal straps and screwed down both sides. Easy fix for me, as its hidden. You could possible do the same...would just be a bit tougher.

Bad design if you ask me!

_________________
2007 358 T-5.7GXi IB
Previous Boats
'08 H240, '08 V318, '04 268, '04 225


Top
 Profile  
 
PostPosted: Fri Jul 11, 2014 11:39 am 
Offline
email admin your custom rank

Joined: Tue Jan 18, 2011 8:45 pm
Posts: 333
acguy wrote:
It is starboard, you should be able to get a piece at the service counter there at Bridgeport.
Any chance you could epoxy it and then re-screw it?


Epoxy won't adhere to starboard. You have to flash the starboard to get it to adhere. You can weld it with starboard rods.


3M scotchweld is supposed to work but is like $100 a tube


Top
 Profile  
 
PostPosted: Fri Jul 11, 2014 5:49 pm 
Offline
email admin your custom rank

Joined: Sun Jul 05, 2009 5:56 am
Posts: 930
Location: Georgian Bay, Ontario
Thalasso wrote:
acguy wrote:
It is starboard, you should be able to get a piece at the service counter there at Bridgeport.
Any chance you could epoxy it and then re-screw it?


Epoxy won't adhere to starboard. You have to flash the starboard to get it to adhere. You can weld it with starboard rods.


3M scotchweld is supposed to work but is like $100 a tube


That's a piece of info, thanks!!

_________________
2001 328 Vista "Nauta Dream 2"
AB Inflatable 10AL "Little Dreamer"
2000 248 Vista
1997 225 Sundowner


Mike


Top
 Profile  
 
PostPosted: Fri Jul 11, 2014 7:13 pm 
Offline
Dolphin
User avatar

Joined: Fri May 16, 2014 8:17 pm
Posts: 99
Location: Bridge Port Marina - Orillia
Thanks for the insights. I am currently out on Georgian Bay with 58 other boats and will look to tackle this "project" on my own next week and perhaps post some pictures of our Rendezvous.

_________________
Image
Ernie Follis
It'll Do II
Four Winns 348 (2005)


Top
 Profile  
 
PostPosted: Sat Jul 12, 2014 3:23 am 
Offline
Shark
User avatar

Joined: Fri Mar 11, 2011 8:24 pm
Posts: 149
Location: Perth, Western Australia
Same thing happened to me, I posted my solution on May 23.


The headrest on the co-pilot's seat at the helm broke off. At the time it looked like a very expensive disaster. I suspect that it gets used as a grab rail when people move about the boat and the design/engineering is a bit lacking. To fix it, I removed the seat from the boat and took the seat back off. The plastic part in the photo is attached to 3/4" plywood within the headrest and the plywood within the seat at the bottom.

Image


I removed the staples from the headrest vinyl cover and managed to pull it off without breaking the stitching. I made a replacement part for the broken plastic. I considered buying a piece of Starboard but, as I usually do, I relocated a plastic cutting board from the kitchen to my shed. After cutting the plastic to size I beefed it up with 3mm aluminum cut to the same size and reassembled the headrest and screwed it in place. I found it very difficult to get the vinyl back on and stapled down but a local canvas/upholstery shop did it for $10. It's many times stronger than the original.

_________________
John
2006 Four Winns Vista 278 (sold)


Top
 Profile  
 
PostPosted: Sat Jul 12, 2014 10:02 am 
Offline
Dolphin
User avatar

Joined: Fri May 16, 2014 8:17 pm
Posts: 99
Location: Bridge Port Marina - Orillia
John, this is most helpful, as I was concerned that the problem would reoccur if i just made the pattern over without reinforcement. I will work on it next week and probably get some upholstery support as you did. Thanks.

_________________
Image
Ernie Follis
It'll Do II
Four Winns 348 (2005)


Top
 Profile  
 
PostPosted: Tue Jul 15, 2014 2:51 pm 
Offline
Dolphin
User avatar

Joined: Fri May 16, 2014 8:17 pm
Posts: 99
Location: Bridge Port Marina - Orillia
jfair wrote:
The plastic part in the photo is attached to 3/4" plywood within the headrest and the plywood within the seat at the bottom.

Image


I should have read jfairs commentary more closely - I was surprised to find the wood attached to the Starboard. Here is my progress to date.

I was amazed how many staples there were.
Image

I was surprised to find the wood inside and it was a challenge to scrape the foam off of the wood and Starboard - they must used some spray adhesive - took over and hour to slowly scrape it off through the opening at the bottom
Image

Got one corner off and then had to slowly peel it back removing adhesive from the top side which as not accessible
Image

Now I have to decide on trying to pry the wood from the broken Starboard, or cut another one. The staples they use are deep.
Image


I may try to use a 3/4 inch Starboard instead of the 1/2 inch for strength - my only fear is the headrest will not sit the same as the old one and it may interfere with the back fitting in properly.

More progress reports later.

A couple quick pics from my recent Parkbridge Marinas Rendezvous up to Georgian Bay last week. 61 boats in total - a handful of Four Winns and no mechanical issues - except the headrest!
Image

Image

_________________
Image
Ernie Follis
It'll Do II
Four Winns 348 (2005)


Top
 Profile  
 
PostPosted: Wed Jul 16, 2014 12:22 am 
Offline
Shark
User avatar

Joined: Fri Mar 11, 2011 8:24 pm
Posts: 149
Location: Perth, Western Australia
Ernie

This is what I used to cut out a new piece of plastic:

Image

The replacement board was 3 mm thinner than the original and I happened to have a piece of aluminum 3 mm thick. To reassemble the headrest without disturbing the stitching was quite difficult.
I suggest that if you use thicker plastic then reduce the thickness of the plywood - to avoid sewing.

John

_________________
John
2006 Four Winns Vista 278 (sold)


Top
 Profile  
 
PostPosted: Wed Jul 16, 2014 6:12 am 
Offline
email admin your custom rank

Joined: Fri Apr 12, 2013 3:56 pm
Posts: 305
Location: Southern ohio
I was going to say the same thing. Use 3/4" starboard and 1/2" plywood should result in same thickness.

_________________
Image
2001 Four Winns Vista 248 by rick2752, on Flickr


Top
 Profile  
 
PostPosted: Wed Jul 16, 2014 8:44 am 
Offline
email admin your custom rank

Joined: Tue Jan 18, 2011 8:45 pm
Posts: 333
Starboard is machinable just like wood. You can run it through a planer if need be


Top
 Profile  
 
PostPosted: Sun Jul 20, 2014 7:44 pm 
Offline
Dolphin
User avatar

Joined: Fri May 16, 2014 8:17 pm
Posts: 99
Location: Bridge Port Marina - Orillia
Finally done....

If you have ever had to fix a small item with your house, car or boat..... and it turned into a major time consumer, this headrest is on my list of time consumers.
I got the headrest reconfigured with some new starboard (an old boat table top for free for material) and part of the old headrest stapled together), and stapled at a local ulpholstery shop.

Image

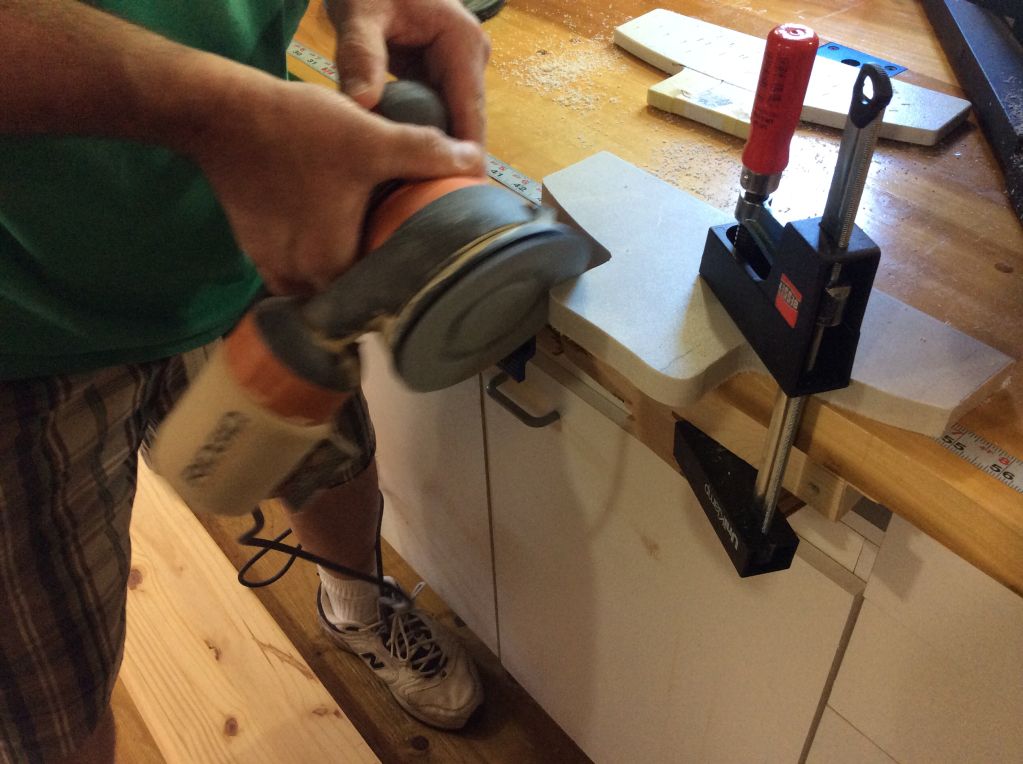
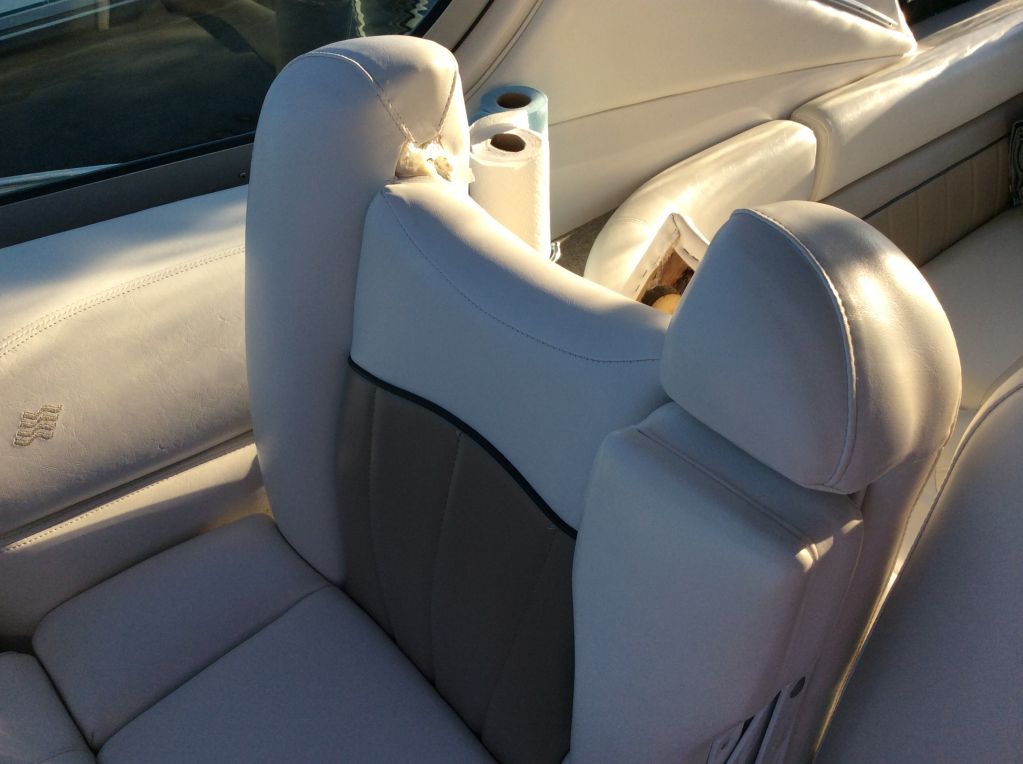
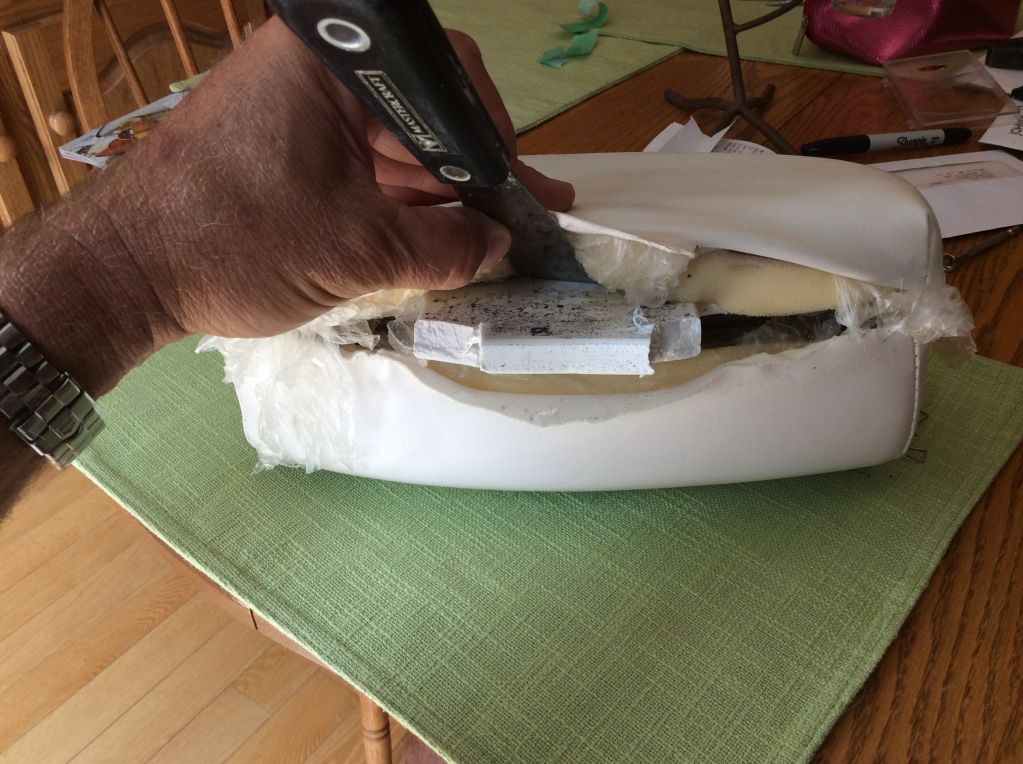
When the electric seat slider is moved fully forward, you can see in the following pictures that FW made a solid seat, WHEN made in the shop, but it is absolutely horrible to work on WHEN working in the boat.
The top is linked with a "hook into a hole configuration" (seen in the following two pictures).

Image

Image

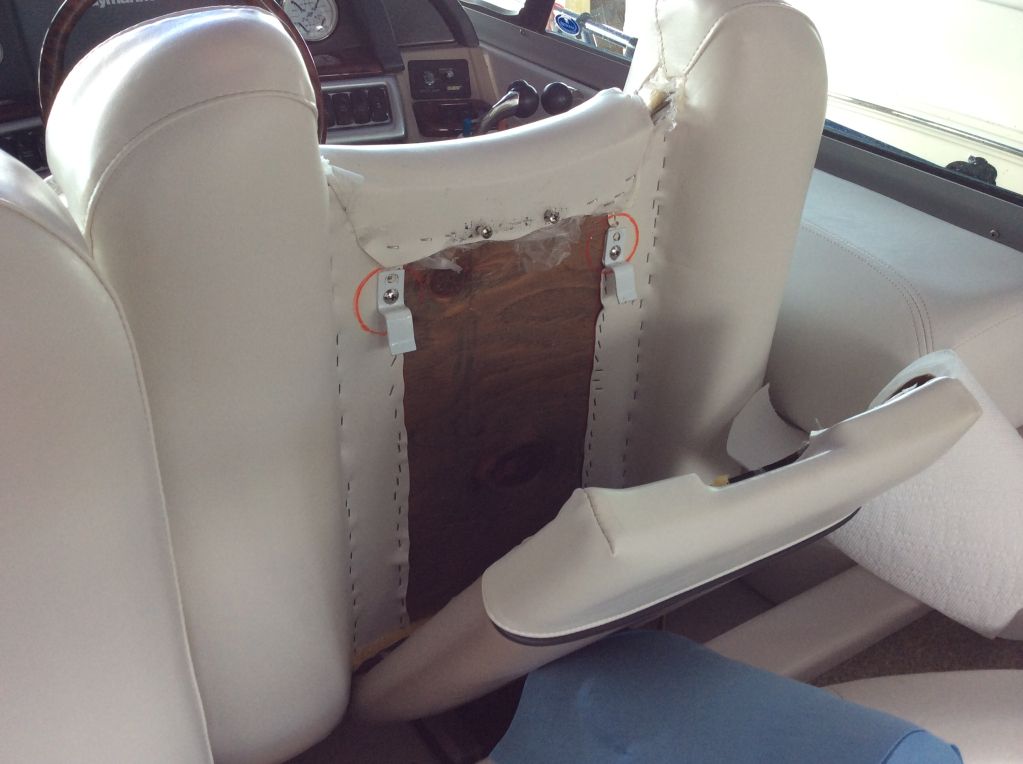
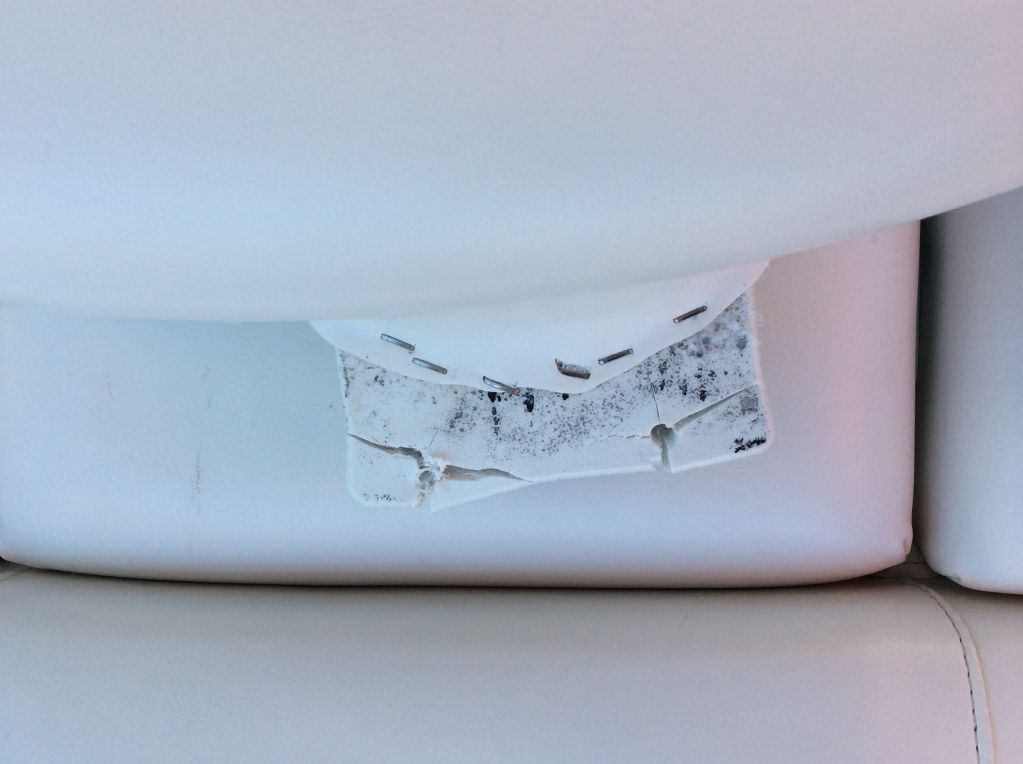
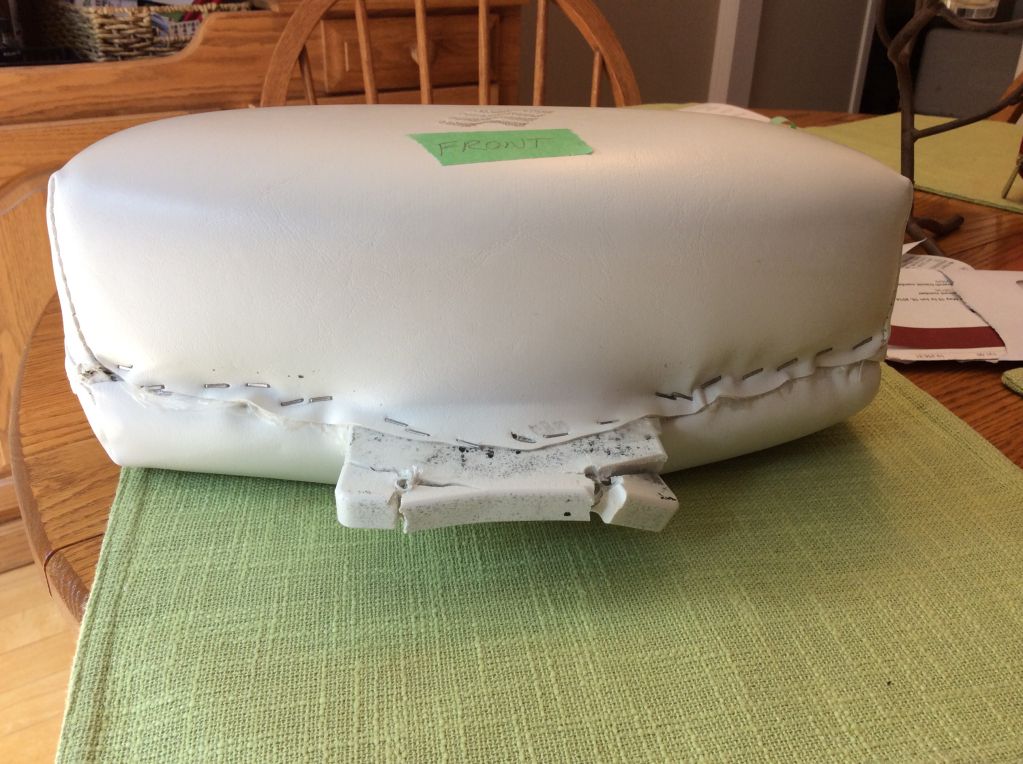
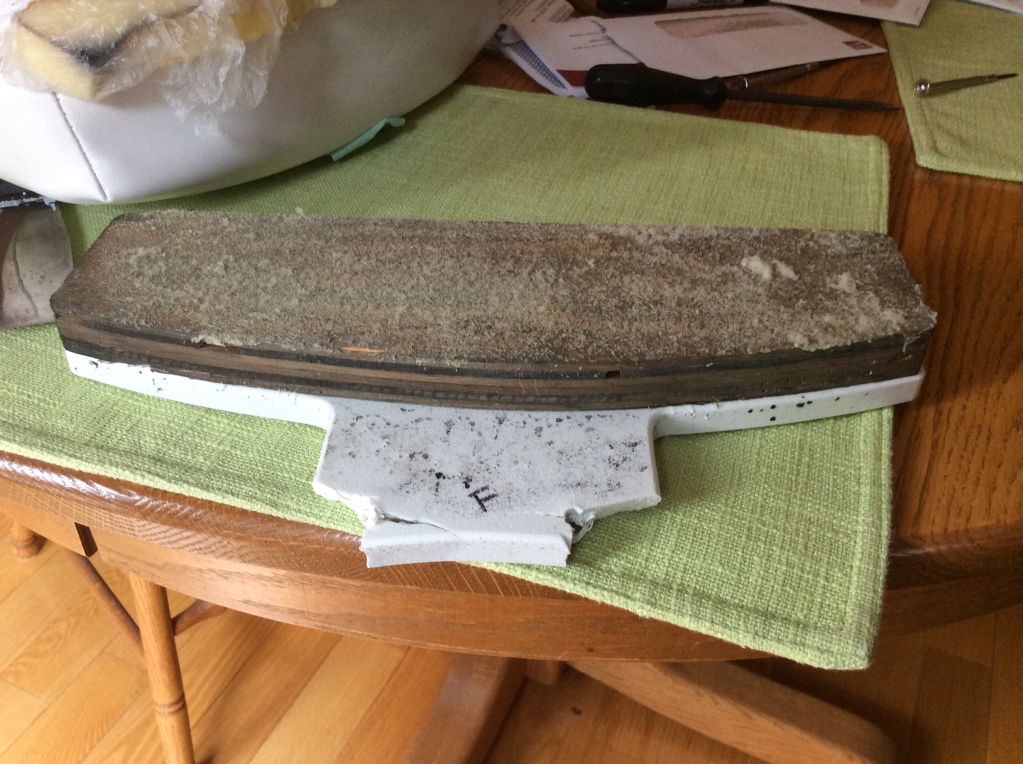
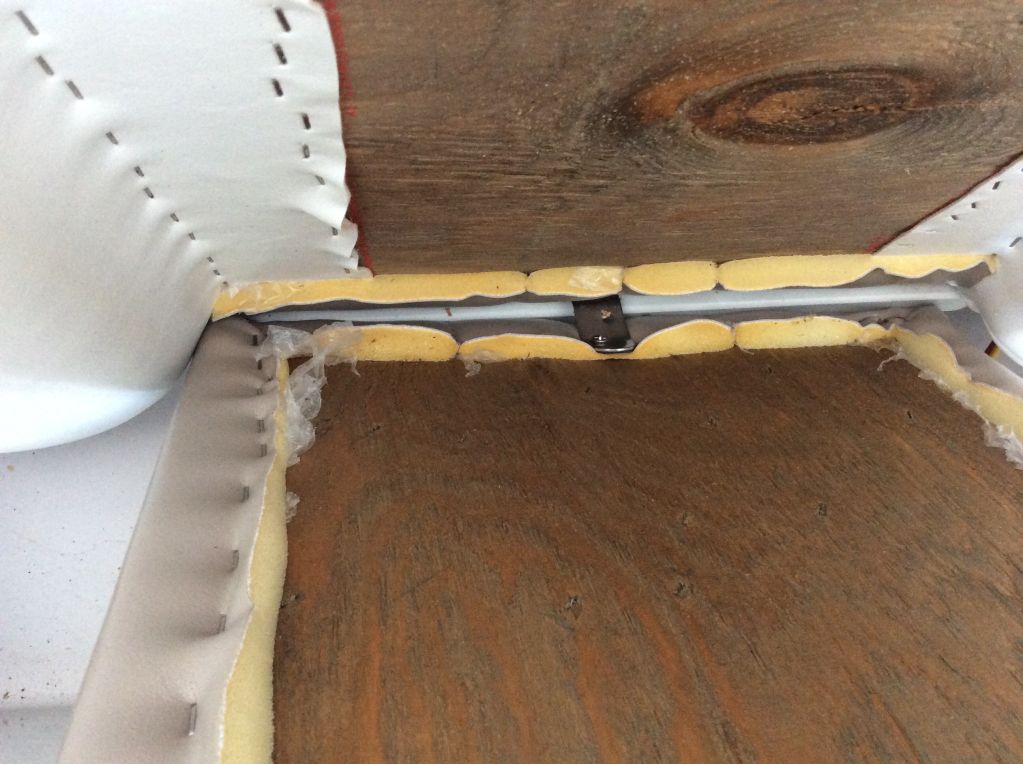
But look how the two pieces are joined at the bottom, a metal plate with screws on each end joining the two pieces. I eventually removed the whole seat from the boat so I could work on it without being constricted for space. To do this I had to remove the storage bin located behind my feet while seated in captains chair. Even then, it took me an hour with a pair of pliers turning a half inch screw bit, because a screwdriver would not fit! Brilliant FW!!!

Image

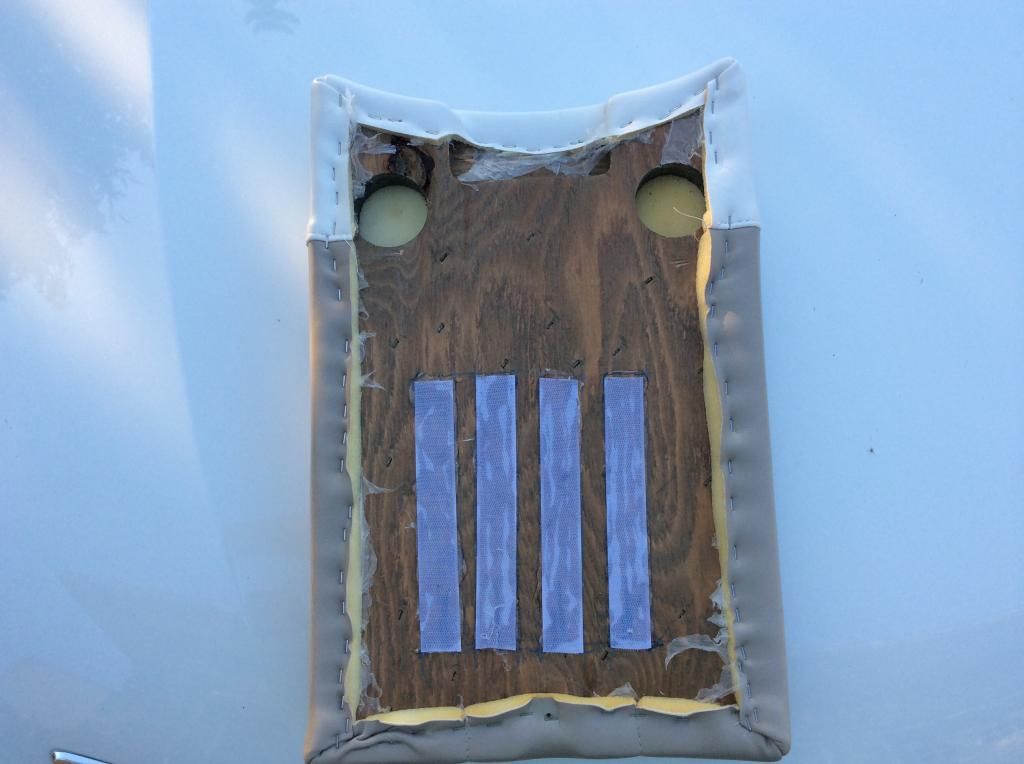
After an hour of trying to get this bottom screw(s) out, I eventually just bent the metal plate holding them together, and bent it under the material and decided to use another joining method - VELCRO - works great, but when used in conjunction with the hook and hole method shown earlier, it almost makes the two pieces impossible to separate, as the Velcro will not slide when joined, and the "hook-hole", need some sliding to be pivoted out. Anyways, after practice fitting it once, and taking 15 minutes to separate the two parts, I now feel confident the back will stay on and I will leave any future owner a note on how to open it, if ever required.

Image

Image

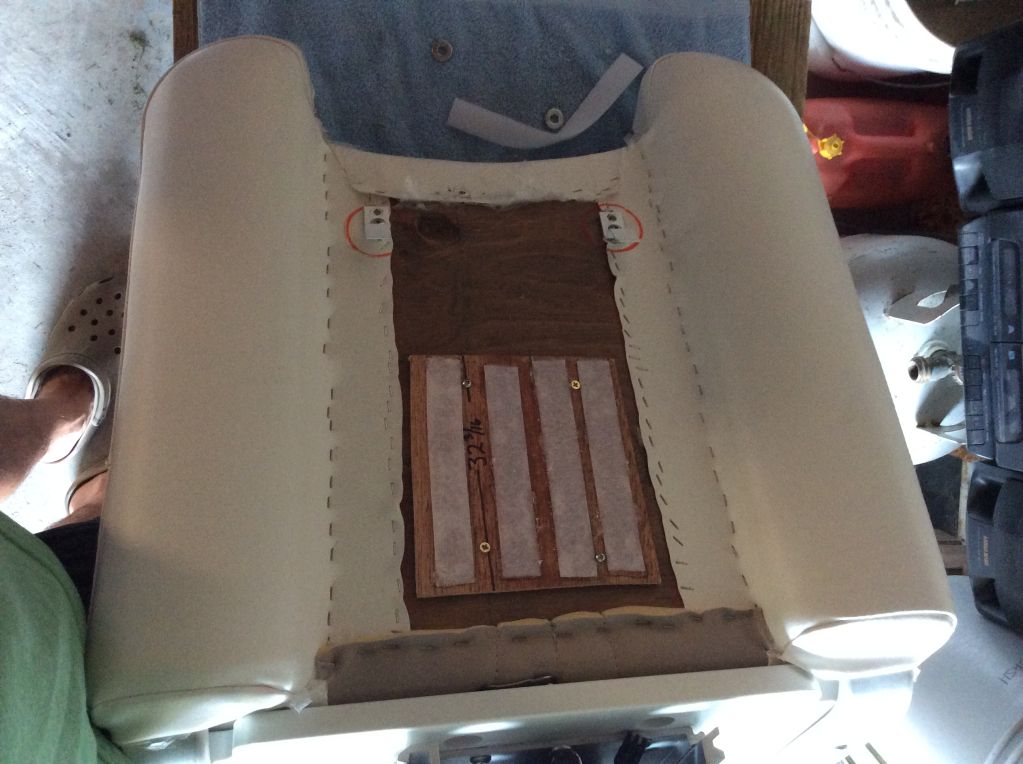
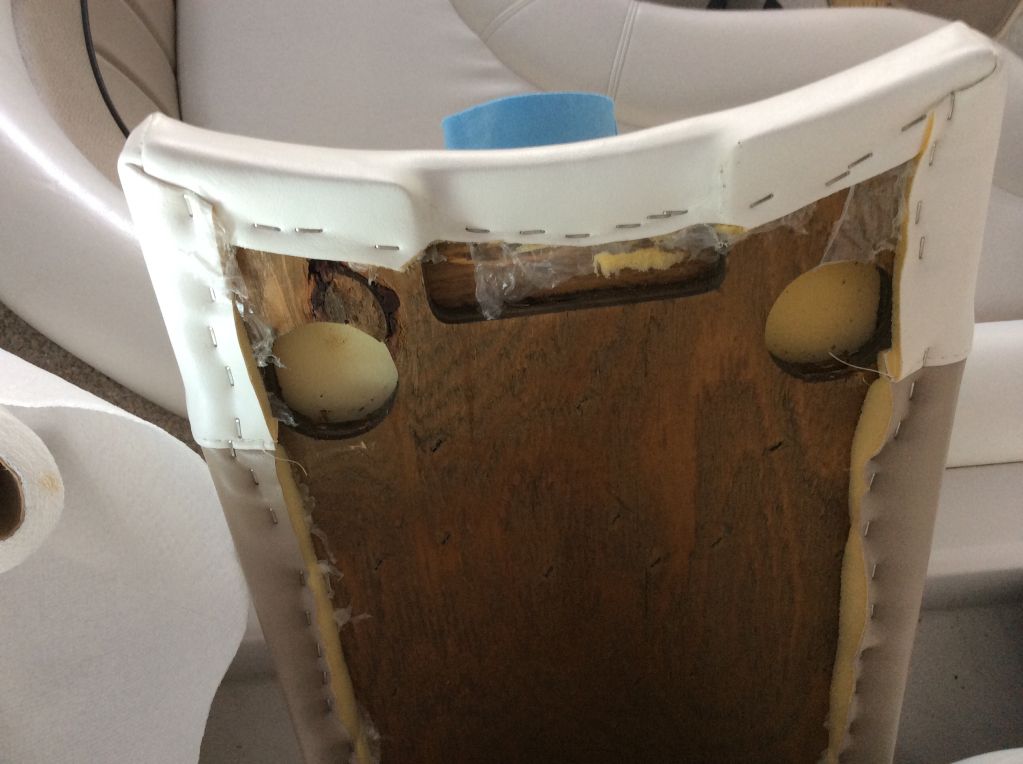
You can see I attached the headrest with 3 screws and washers, and it is much stronger than the factory method of 2 screws at the base ( sort of like putting a post on the ground and attaching it with nails to the floor - it just is a bad design!).

Image

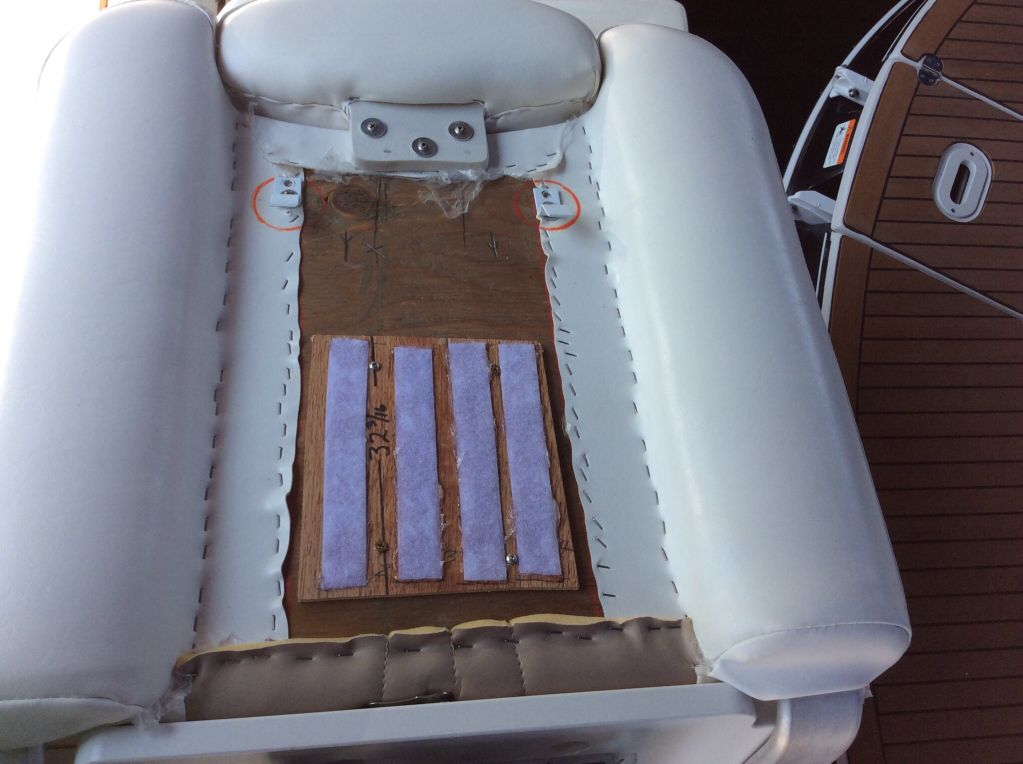
Anyways, it is done, it is strong, and if I had to do it again, I could do it in half the time,with everything I learned the hard way.

_________________
Image
Ernie Follis
It'll Do II
Four Winns 348 (2005)


Top
 Profile  
 
PostPosted: Mon Jul 21, 2014 5:32 am 
Offline
email admin your custom rank

Joined: Fri Apr 12, 2013 3:56 pm
Posts: 305
Location: Southern ohio
Great job, and thanks for the pics and process.

_________________
Image
2001 Four Winns Vista 248 by rick2752, on Flickr


Top
 Profile  
 
PostPosted: Mon Jul 21, 2014 6:22 am 
Offline
email admin your custom rank

Joined: Thu Jul 13, 2006 7:45 pm
Posts: 2866
Location: Indiana
Great write up! Thank you.

_________________
2007 358 T-5.7GXi IB
Previous Boats
'08 H240, '08 V318, '04 268, '04 225


Top
 Profile  
 
Display posts from previous:  Sort by  
Post new topic Reply to topic  [ 18 posts ]  Go to page 1, 2  Next

All times are UTC - 6 hours [ DST ]


Who is online

Users browsing this forum: No registered users and 74 guests


You cannot post new topics in this forum
You cannot reply to topics in this forum
You cannot edit your posts in this forum
You cannot delete your posts in this forum

Search for:
Jump to:  
Powered by phpBB® Forum Software © phpBB Group