www.iFourWinns.com

Dedicated to Current and Future Owners
It is currently Sat Apr 27, 2024 9:22 am

All times are UTC - 6 hours [ DST ]


Post new topic Reply to topic  [ 21 posts ]  Go to page Previous  1, 2
Author Message
 Post subject: Re: bimini part
PostPosted: Sun Aug 22, 2010 11:28 pm 
Offline
Dolphin
User avatar

Joined: Sat Feb 07, 2009 11:59 am
Posts: 80
Location: Vancouver WA
great idea... !!

_________________
Dennis

2007 H190
4.3 liter
Seattle WA


Top
 Profile  
 
 Post subject: Re: bimini part
PostPosted: Mon Aug 23, 2010 4:43 pm 
Offline
email admin your custom rank
User avatar

Joined: Wed Apr 08, 2009 7:31 pm
Posts: 265
Location: Bedford, NH
The new ones aren't going anywhere. They're slid onto the post and they have a rivet type pin in them. I hope mine never break...they look like a bear to change.

_________________
2010 H190 4.3VP
Tow Vehicle:
2007 F150
Previous boats:
2009 H180 3.0VP
1996 Horizon QX 3.0VP

Image


Top
 Profile  
 
 Post subject: Re: bimini part
PostPosted: Thu Apr 14, 2011 11:58 pm 
Offline
Tadpole

Joined: Thu Apr 14, 2011 4:38 pm
Posts: 1
Like many of you I was puzzled that the white plastic clips were no longer being stocked by Four Winns dealers. Guess they sourced the new part design in response to so many of the white clips breaking. They certainly look more durable, but you’ll have to disassemble the bimini tube caps in order to get them on. It wasn’t the easiest thing ever, but thanks to a good Samaritan (Matt at Intermarine Boats in FL—I owe you!!) I was able to learn how to make the modification. And now I’m sharing it with you.

Image

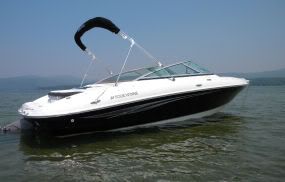
First off, this job is most easily accomplished with the bimini top FULLY DEPLOYED. That way you can work alone on the individual bimini tubes while the rest of the structure stays supported. No spotter is required.

Image


TOOLS NEEDED:

Flat head screwdriver (as wide as possible)
Electric drill (most cordless drills lack the torque needed to drill out rivets)
1/8” drill bit (pilot hole drilling)
11/64” or 3/16” drill bits (removes the bulk of the rivet)
Machine oil (cools the metal while drilling)
Punch tool (aids in pushing the old rivet body through the hole)
Needle nosed pliers (aids in peeling off stubborn rivet heads)
3/16” rivets (stainless steel or aluminum—I could only find aluminum ones)
Riveting tool with a 1/4-inch nosepiece.

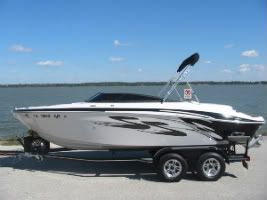
Here’s a general overview of the work required…you’ll need to remove the tube caps, circled below in red, using a drill to bore out the rivets. Additionally, the top tube is anchored in a pivot block and held in place with a single screw. That screw needs to be removed so you can pull the tube out of the pivot block and work on the cap.

Image
Image


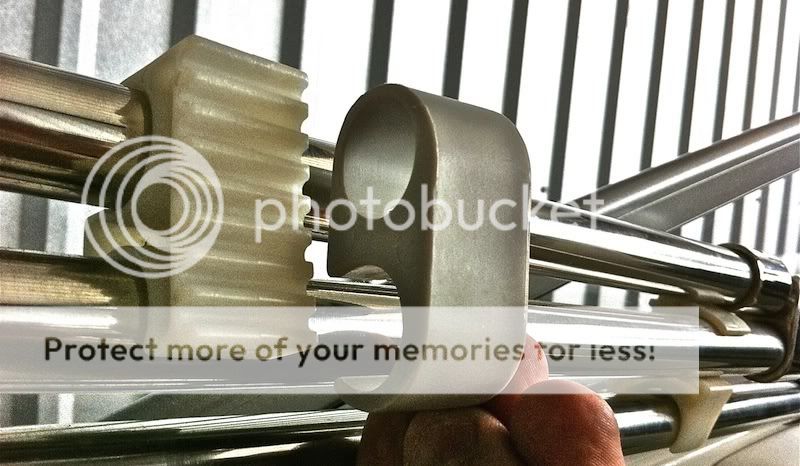
Once the cap is off, just slide the closed end of the new clip onto the tube and then reattach the cap with a 3/16” rivet (see photo). You can find a good variety of riveters (manual or pneumatic) at Harbor Freight Tools, and the rivets are available at True Value or Ace Hardware. Personal preference only: a pneumatic riveter works the best.

Image

The rivet holes in these tubes are 3/16” in diameter, so we’re going to start small at first with a 1/8” pilot hole, then finish with a wider 11/64” or 3/16” bit. I actually used the 11/64” bit because I didn’t want to risk widening the rivet hole. The goal is to separate the rivet head from its body, so you can push the body through the hole and take off the tube cap. It’ll take some work to drill all the way through the back of the rivet, but don’t give up. Each one gets easier as you gain practice.

Image


At this point I stopped taking pictures, but hopefully you get the idea. Just remember: don’t disassemble the main bimini tube (that’s the middle one with the kink and the black rubber disk on it). The new slide-on clip can’t make it past that kink. As far as the orientation of the new clips, I faced the open side towards the water. But I really don’t think it matters. It’s entirely up to you; either way works the same.

Hope this helps, you guys. I really fretted over this project initially but it turned out to be fairly easy. It’s a good DIY task, and besides, I doubt most dealerships even know how to install these clips, given that they’re so new. Best of luck!

_________________
2007 220 Horizon
5.0 GXI / Penta SX


Top
 Profile  
 
 Post subject: Re: bimini part
PostPosted: Mon Apr 02, 2012 8:07 pm 
Offline
email admin your custom rank

Joined: Wed Feb 13, 2008 10:11 am
Posts: 663
Location: Corinth, TX
Nice photo/write up WN and Nice first post. I stopped by in hopes of finding the right part number for these bimini clips only to find out that they are no longer making them :evil:. In four years I only lost one and got a replacement at the time from my selling Four Winns dealer, who dropped the line last year. This spring I found out one of them is broken and fear the other 3 are set to go soon, so I was just going to replace them all. Since I'm probably not going to be able to get the part from them anymore I was just going to order some, now I get to drill and re-rivit 4 of my pole caps as well. Yeah!!!! :roll:

_________________
2008 H210SS VP 5.7 Gi/SX
2011 Ford F150 FX4 EB
Image


Top
 Profile  
 
 Post subject: Re: bimini part
PostPosted: Mon Apr 02, 2012 8:22 pm 
Offline
email admin your custom rank

Joined: Wed Feb 13, 2008 10:11 am
Posts: 663
Location: Corinth, TX
Here might be a similar option:
http://www.rochfordsupply.com/product_listing.asp_Q_CatID_E_409_A_SubCatID_E_439_A_ProdID_E_3705

I ordered some. I will update this post later concerning quality, etc.

_________________
2008 H210SS VP 5.7 Gi/SX
2011 Ford F150 FX4 EB
Image


Top
 Profile  
 
 Post subject: Re: bimini part
PostPosted: Mon Apr 02, 2012 8:46 pm 
Offline
email admin your custom rank

Joined: Wed Jun 01, 2011 10:21 am
Posts: 5667
Location: Austin, TX
Nobody makes the part anymore because they're useless. Throw them in the trash can. If you're THAT concerned about the possibility of the poles clanging together when the boat is in storage and not in use:

Stow the top, press poles together and find spot of possible contact.. Drill rivets, get a nice piece (like 1in) of clear hose that fits snug on pole. Lube it up with some soapy water, press little piece of hose to location, let dry. No more stupid clips to loose and the clear hose is always in position.

_________________
1981 Columbia 8.7
2015 Yamaha FZR - 87mph - sold
2006 Yamaha GP1300R - sold
2003 Chaparral 215 SSI - sold
2009 Stingray 195CS - sold
2000 Four Winns H180 - sold
1976 O'day Daysailer II - sold

Rick's Four Winns H180 Mods/Upgrade Thread


Top
 Profile  
 
Display posts from previous:  Sort by  
Post new topic Reply to topic  [ 21 posts ]  Go to page Previous  1, 2

All times are UTC - 6 hours [ DST ]


Who is online

Users browsing this forum: No registered users and 18 guests


You cannot post new topics in this forum
You cannot reply to topics in this forum
You cannot edit your posts in this forum
You cannot delete your posts in this forum

Search for:
Jump to:  
Powered by phpBB® Forum Software © phpBB Group